
戻る>2006
以下のようなアプリケーションを作ってみる.
まずは HelloActivity
【注意】 この手順では,android-sdk-windows\platforms\android-4\samples\HelloActivity 以下を直接編集してしまいます.
【注意】 別の場所にコピーしてから,「Create project form existing source」などとすべきです.
として,Android 1.6 あたりをチェックしてから,HelloActivity を選択して,Finish.
画面周りを修正
res/layout/hello_activity.xml を以下のように修正.
res/values/strings.xml を以下のように修正.
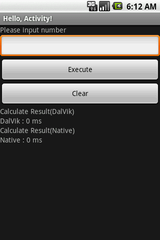
以下の画面になる.
ボタンの定義など
src/com/example/android/helloactivity/HelloActivity.java を修正.
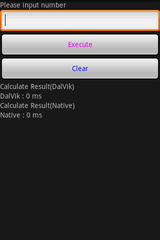
以下の画面になる.
ボタン押し下げに対する挙動を定義する
onCLick を修正.
入力ボックスに,10000を入力して,execute ボタンを押したところ.

拡張) 計算をスレッド実行する
スレッド本体
HelloActivity の前あたりに,以下を記述.
スレッドを実行する側
開始時間取得と,終了時間取得の間を以下のように修正.
実行結果
2スレッドで計算して結果を足しているので,計算結果が通常の倍になる.
待ち合わせ(join)が出来ていないと,計算結果が不正になるはず.

つづく
以下のようなアプリケーションを作ってみる.
- ウインドウタイトルバーを非表示
- 全画面表示
- 1つの入力ボックス
- 2つのボタン(実行とクリア)
- 実行ボタンを押した時の処理
- 1から入力ボックに入力した数字までを足して結果を出力
- 拡張) 計算をスレッド実行する.
- 実行時間を出力
- クリアボタンを押した時の処理
- 表示を初期状態に戻す
まずは HelloActivity 
【注意】 この手順では,android-sdk-windows\platforms\android-4\samples\HelloActivity 以下を直接編集してしまいます.
【注意】 別の場所にコピーしてから,「Create project form existing source」などとすべきです.
File -> New -> Project -> Android Project -> Create Project from existing sample
として,Android 1.6 あたりをチェックしてから,HelloActivity を選択して,Finish.
Run as -> Android Application
画面周りを修正
res/layout/hello_activity.xml を以下のように修正.
<?xml version="1.0" encoding="utf-8"?>
<!-- Copyright (C) 2007 The Android Open Source Project

     Licensed under the Apache License, Version 2.0 (the "License");
     you may not use this file except in compliance with the License.
     You may obtain a copy of the License at

          http://www.apache.org/licenses/LICENSE-2.0

     Unless required by applicable law or agreed to in writing, software
     distributed under the License is distributed on an "AS IS" BASIS,
     WITHOUT WARRANTIES OR CONDITIONS OF ANY KIND, either express or implied.
     See the License for the specific language governing permissions and
     limitations under the License.
-->

<LinearLayout xmlns:android="http://schemas.android.com/apk/res/android"
    android:orientation="vertical"
    android:layout_width="fill_parent"
    android:layout_height="fill_parent"
    >

<TextView android:id="@+id/TextView01" android:layout_width="wrap_content" android:layout_height="wrap_content" android:text="@string/message"></TextView>

<EditText android:id="@+id/EditText01" android:layout_height="wrap_content" android:layout_width="fill_parent" android:inputType="number">    </EditText>
<Button   android:id="@+id/Button01"   android:layout_height="wrap_content" android:layout_width="fill_parent" android:text="@string/execute"></Button>
<Button   android:id="@+id/Button02"   android:layout_height="wrap_content" android:layout_width="fill_parent" android:text="@string/clear">  </Button>

<TextView android:id="@+id/TextView02" android:layout_width="wrap_content" android:layout_height="wrap_content" android:text="Calculate Result(DalVik)"></TextView>
<TextView android:id="@+id/TextView03" android:layout_width="wrap_content" android:layout_height="wrap_content" android:text="@string/elapsedDalVik">   </TextView>
<TextView android:id="@+id/TextView04" android:layout_width="wrap_content" android:layout_height="wrap_content" android:text="Calculate Result(Native)"></TextView>
<TextView android:id="@+id/TextView05" android:layout_width="wrap_content" android:layout_height="wrap_content" android:text="@string/elapsedJni">      </TextView>

</LinearLayout>
res/values/strings.xml を以下のように修正.
<?xml version="1.0" encoding="utf-8"?>
<!-- Copyright (C) 2007 The Android Open Source Project

     Licensed under the Apache License, Version 2.0 (the "License");
     you may not use this file except in compliance with the License.
     You may obtain a copy of the License at

          http://www.apache.org/licenses/LICENSE-2.0

     Unless required by applicable law or agreed to in writing, software
     distributed under the License is distributed on an "AS IS" BASIS,
     WITHOUT WARRANTIES OR CONDITIONS OF ANY KIND, either express or implied.
     See the License for the specific language governing permissions and
     limitations under the License.
-->

<resources>

	<string name="message">Please input number</string>
	<string name="execute">Execute</string>
	<string name="elapsedDalVik">DalVik : 0 ms</string>
	<string name="elapsedJni">Native : 0 ms</string>
	<string name="clear">Clear</string>

</resources>
Run as -> Android Application
以下の画面になる.

- 入力ボックスに数字が入る.
- Execute ボタンを押しても何もおこらない.
- Clear ボタンを押しても何もおこらない.
ボタンの定義など
src/com/example/android/helloactivity/HelloActivity.java を修正.
/*
 * Copyright (C) 2007 The Android Open Source Project
 *
 * Licensed under the Apache License, Version 2.0 (the "License");
 * you may not use this file except in compliance with the License.
 * You may obtain a copy of the License at
 *
 *      http://www.apache.org/licenses/LICENSE-2.0
 *
 * Unless required by applicable law or agreed to in writing, software
 * distributed under the License is distributed on an "AS IS" BASIS,
 * WITHOUT WARRANTIES OR CONDITIONS OF ANY KIND, either express or implied.
 * See the License for the specific language governing permissions and
 * limitations under the License.
 */

package com.example.android.helloactivity;

//import com.example.helloandroid.R;

import android.app.Activity;
import android.graphics.Color;
import android.os.Bundle;
import android.view.View;
import android.view.Window;
import android.view.WindowManager;
import android.view.View.OnClickListener;
import android.widget.Button;


/**
 * A minimal "Hello, World!" application.
 */
public class HelloActivity extends Activity implements OnClickListener {
    View execButton,clearButton;

    public HelloActivity() {
    }

    /**
     * Called with the activity is first created.
     */
    @Override
    public void onCreate(Bundle savedInstanceState) {
        super.onCreate(savedInstanceState);

        /* 全画面表示 */
        getWindow().addFlags(WindowManager.LayoutParams.FLAG_FULLSCREEN);
        /* ウィンドウタイトルバーを非表示 */
        requestWindowFeature(Window.FEATURE_NO_TITLE);

        // Set the layout for this activity.  You can find it
        // in res/layout/hello_activity.xml
        setContentView(R.layout.hello_activity);

        /* execute ボタン */
        execButton = this.findViewById(R.id.Button01);
        ((Button)execButton).setTextColor(Color.MAGENTA);
        execButton.setOnClickListener(this);

        /* clear ボタン */
        clearButton = this.findViewById(R.id.Button02);
        ((Button)clearButton).setTextColor(Color.BLUE);
        clearButton.setOnClickListener(this);

    }

	@Override
	public void onClick(View arg0) {
		// TODO Auto-generated method stub

	}
}
Run as -> Android Application
以下の画面になる.

ボタン押し下げに対する挙動を定義する
onCLick を修正.
	@Override
	public void onClick(View arg0) {
		// TODO Auto-generated method stub
    	View edtEnd = this.findViewById(R.id.EditText01);
		String strEnd = ((TextView)edtEnd).getText().toString();

		if(arg0==execButton){
			/* execute ボタンが押されたときの処理 */
			{	// Java 実行
				String strSum="";

				// 開始時間取得
				long sUpTimeMillis = SystemClock.uptimeMillis();

				long sum = 0;
				if(!strEnd.equals("")){
					long numEnd = Long.valueOf(strEnd);

					/* 直接実行 */
					for(int i=0;i<=numEnd;i++){
						sum +=i;
					}
				}
				strSum = String.valueOf(sum);

				// 終了時間取得
				long eUpTimeMillis = SystemClock.uptimeMillis();

				/* 計算結果表示 */
				View txtResult = this.findViewById(R.id.TextView02);
				((TextView)txtResult).setText(strSum);

				/* 計算時間表示 */
				View elpTime = this.findViewById(R.id.TextView03);
				((TextView)elpTime).setText("DalVik : " + String.valueOf(eUpTimeMillis - sUpTimeMillis) + " ms");
			}
		} else {
			/* clear ボタンが押されたときの処理 */
			{
				View elpTime = this.findViewById(R.id.TextView05);
				((TextView)elpTime).setText("Native : 0 ms");
			}
			{
				View elpTime = this.findViewById(R.id.TextView03);
				((TextView)elpTime).setText("DalVik : 0 ms");
			}
		}

	}
入力ボックスに,10000を入力して,execute ボタンを押したところ.

拡張) 計算をスレッド実行する
スレッド本体
HelloActivity の前あたりに,以下を記述.
/* スレッド */
class Count extends Thread {
	private long endNum;
	private long sum;
	public Count(long x){
		endNum=x;
	}
	public void run() {
		sum =0;
		for(int i=0;i<=endNum;i++){
			sum +=i;
		}
	}
	public long getSum(){
		return sum;
	}
}
スレッドを実行する側
開始時間取得と,終了時間取得の間を以下のように修正.
				// 開始時間取得
				long sUpTimeMillis = SystemClock.uptimeMillis();

				long sum = 0;
				if(!strEnd.equals("")){
					long numEnd = Long.valueOf(strEnd);

					/* 直接実行 */
					/*
					for(int i=0;i<=numEnd;i++){
						sum +=i;
					} */

					/* 2スレッド実行 */
					Count thread1 = new Count(numEnd);
					Count thread2 = new Count(numEnd);
					thread1.start();
					thread2.start();
				    try { /* 待ち合わせ */
				    	thread1.join();
				    	thread2.join();
			        } catch(Exception ex) {
			        	ex.printStackTrace();
			        }
					sum = thread1.getSum();
					sum += thread2.getSum();
				}
				strSum = String.valueOf(sum);

				// 終了時間取得
				long eUpTimeMillis = SystemClock.uptimeMillis();
実行結果
2スレッドで計算して結果を足しているので,計算結果が通常の倍になる.
待ち合わせ(join)が出来ていないと,計算結果が不正になるはず.

つづく

コメントをかく