サムネイルのGallery表示
最終更新:
![]() t_yokky2002 2011年12月01日(木) 16:17:08履歴
t_yokky2002 2011年12月01日(木) 16:17:08履歴
Step1 
プロジェクトの作成
次のプロジェクトを作成してください。
| 項目名 | 設定値 |
|---|---|
| プロジェクト名 | image_gallery |
| ビルドターゲット | Android 2.2 |
| アプリケーション名 | イメージギャラリー |
| パッケージ名 | jp.co.example.practice |
| アクティビティの作成 | MainActivity |
| 最小SDKバージョン | 8 |
画像素材
事前にダウンロードしておいた画像を、res/drawable-nodpiフォルダーにコピーしてください。
※drawable-nodpiフォルダーが存在しない場合: resフォルダーを右クリックし、新規→フォルダーより作成
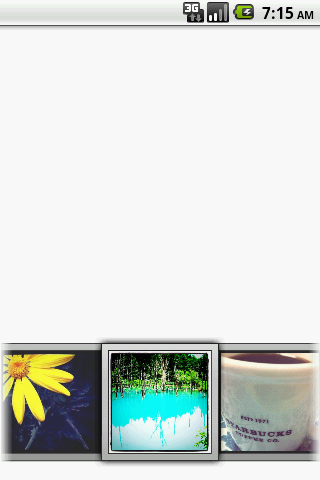
事前準備は完了です。今回は、次のようなアプリを制作します。
※drawable-nodpiフォルダーが存在しない場合: resフォルダーを右クリックし、新規→フォルダーより作成
事前準備は完了です。今回は、次のようなアプリを制作します。
Step2
res/layout/main.xmlを、次のように書き換えてください。
<?xml version="1.0" encoding="utf-8"?>
<LinearLayout xmlns:android="http://schemas.android.com/apk/res/android"
    android:orientation="vertical"
    android:layout_width="match_parent"
    android:layout_height="match_parent"
    android:background="#ffffff"
    android:gravity="center">
  <ImageView
    android:id="@+id/image_view"
    android:layout_width="280dip"
    android:layout_height="280dip"
    android:layout_marginBottom="20dip"
    android:scaleType="centerCrop"
    />
  <Gallery
    android:id="@+id/gallery"
    android:layout_width="match_parent"
    android:layout_height="wrap_content"
    android:background="#00aa0000"
    />
</LinearLayout>
Step3
サムネイル画像をギャラリーに配置する際のレイアウトを作成します。
res/layout/gallery_item.xmlを新規作成し、次の内容に書き換えてください。
res/layout/gallery_item.xmlを新規作成し、次の内容に書き換えてください。
新規作成方法
layoutフォルダーを右クリックし、「新規⇒その他⇒Androidフォルダー⇒Android XMLファイル」を選択
<?xml version="1.0" encoding="utf-8"?>
<LinearLayout xmlns:android="http://schemas.android.com/apk/res/android"
    android:layout_width="wrap_content"
    android:layout_height="wrap_content">
  <ImageView
    android:id="@+id/gallery_image_view"
    android:layout_width="130dip"
    android:layout_height="130dip"
    android:background="?android:attr/galleryItemBackground"
    android:scaleType="fitXY" />
</LinearLayout>
Step4
ギャラリー用のアダプタークラスを作成します。
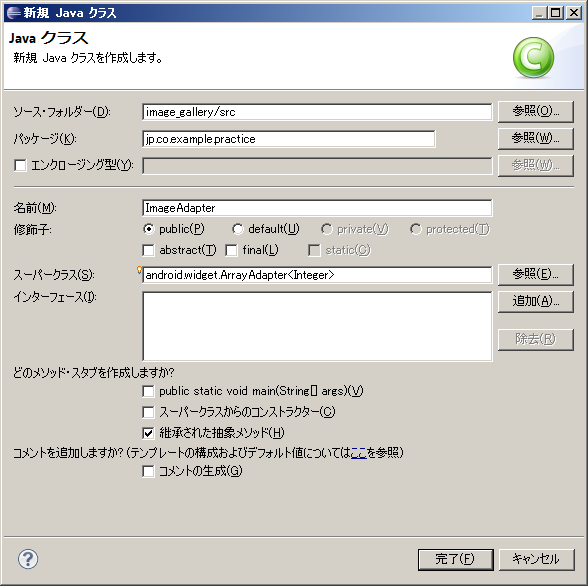
src/jp.co.example.practice/ImageAdapter.javaファイルを新規作成します。
src/jp.co.example.practiceパッケージを右クリックし、新規⇒クラスを選択し、次の内容を入力してください。
次の内容に書き換えてください。
src/jp.co.example.practice/ImageAdapter.javaファイルを新規作成します。
src/jp.co.example.practiceパッケージを右クリックし、新規⇒クラスを選択し、次の内容を入力してください。
次の内容に書き換えてください。
public class ImageAdapter extends ArrayAdapter<Integer> {
        // ↓ここから
	private Context mContext;
	private LayoutInflater mInflater;

	public ImageAdapter(Context context, Integer[] objects) {
		super(context, 0, objects);
		mContext = context;
		mInflater = (LayoutInflater) context
				.getSystemService(Context.LAYOUT_INFLATER_SERVICE);
	}

	// ImageViewに対応するビットマップを表示
	@Override
	public View getView(int position, View convertView, ViewGroup parent) {
		ImageView imageView;
		if (convertView == null) {
			convertView = mInflater.inflate(R.layout.gallery_item, parent,
					false);
		}
		imageView = (ImageView) convertView
				.findViewById(R.id.gallery_image_view);
		imageView.setImageResource(getItem(position));

		return convertView;
	}
        // ↑ここまで
}
Step5
res/jp.co.example.practice/MainActivity.javaを、次のように書き換えてください。
public class MainActivity extends Activity {
        // 追加
	private ImageView mImageView;
	private Integer[] mThumbIds = { R.drawable.photo1, R.drawable.photo8,
			R.drawable.photo7, R.drawable.photo4, R.drawable.photo5,
			R.drawable.photo6, R.drawable.photo9 };

	/** Called when the activity is first created. */
	@Override
	public void onCreate(Bundle savedInstanceState) {
		super.onCreate(savedInstanceState);
		setContentView(R.layout.main);
                // ↓ここから
		mImageView = (ImageView) findViewById(R.id.image_view);
		// サムネイルのギャラリーを作成
		setGallery();
                // ↑ここまで
	}

        // ↓ここから
	public void setGallery() {
		Gallery g = (Gallery) findViewById(R.id.gallery);
		g.setAdapter(new ImageAdapter(this, mThumbIds));

		g.setOnItemClickListener(new OnItemClickListener() {
			public void onItemClick(AdapterView<?> parent, View v,
					int position, long id) {
				Toast.makeText(MainActivity.this, "" + position, Toast.LENGTH_SHORT).show();
			}
		});
	}

	public void setImageBitmap(Bitmap bmp) {
		mImageView.setImageBitmap(bmp);
	}
        // ↑ここまで
}
Step6
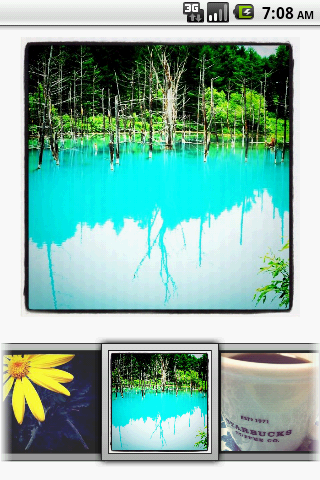
実行してください。画像を押下すると、トーストにて番号が表示されます。
Step7
テーマの適用
Gallery用のテーマに設定されている「背景画像」を適用します。
res/values/attrs.xmlを新規作成し、次の内容に書き換えてください。
res/values/attrs.xmlを新規作成し、次の内容に書き換えてください。
<?xml version="1.0" encoding="utf-8"?>
<resources>
  <declare-styleable name="MyGallery">
    <attr name="android:galleryItemBackground" />
  </declare-styleable>
</resources>
アダプターの修正
public class ImageAdapter extends ArrayAdapter<Integer> {
	private Context mContext;
	private LayoutInflater mInflater;
	private int mGalleryItemBackground; 	//--- 追加 ---

	public ImageAdapter(Context context, Integer[] objects) {
		super(context, 0, objects);
		mContext = context;
		mInflater = (LayoutInflater) context
				.getSystemService(Context.LAYOUT_INFLATER_SERVICE);

                //--- ↓ここから ---
		TypedArray a = mContext.obtainStyledAttributes(R.styleable.MyGallery);
		// Gallery用テーマで設定されている背景画像のリソースIDを取得
		mGalleryItemBackground = a.getResourceId(
				R.styleable.MyGallery_android_galleryItemBackground, 0);
		a.recycle();
		//--- ↓ここまで ---
	}

	// ImageViewに対応するビットマップを表示
	@Override
	public View getView(int position, View convertView, ViewGroup parent) {
		ImageView imageView;
		if (convertView == null) {
			convertView = mInflater.inflate(R.layout.gallery_item, parent,
					false);
		}
		imageView = (ImageView) convertView
				.findViewById(R.id.gallery_image_view);
		imageView.setBackgroundResource(mGalleryItemBackground); 	//--- 追加 ---
		imageView.setImageResource(getItem(position));

		return convertView;
	}
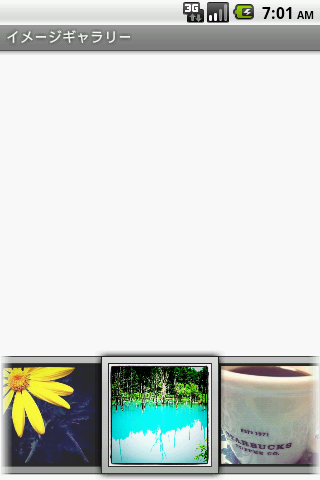
Step8
実行し、確認してください。
コメントをかく