目次 
OnRenderImage
void OnRenderImage(RenderTexture src, RenderTexture dst)
全てのレンダリングが完了しRenterTextureにレンダリングされた後に呼び出される。
メソッド内では以下のように処理を行う。
例えば、Blitにマテリアル(mat)にブラーなどのシェーダーを渡して、ポストエフェクトを実現する。
// src をそのまま dst へ出力
Graphics.Blit(src, dst);


// src にマテリアル(シェーダー)を適用して dst へ出力
Graphics.Blit(src, dst, mat);


// src にマテリアル(シェーダー)、オフセットを適用して dst へ出力
Vector2[] offsets = new Vector2[]
{
	new Vector2(0, 0),		// オフセットなし
	new Vector2(10, 10),	// x, y 10ピクセルずらす
};
Graphics.BlitMultiTap(src, dst, mat, offsets);
ガウスフィルタを自作してみる
UnityのProAssetにはガウスフィルタが含まれていますが、学習を兼ねて自作してみました。
理解していない部分がいくつかあるので、
無駄な処理があったり、謎な処理があったりするかもしれません。
ツッコんでもらえると助かります。
- 2パスレンダリング
- GrabTexture
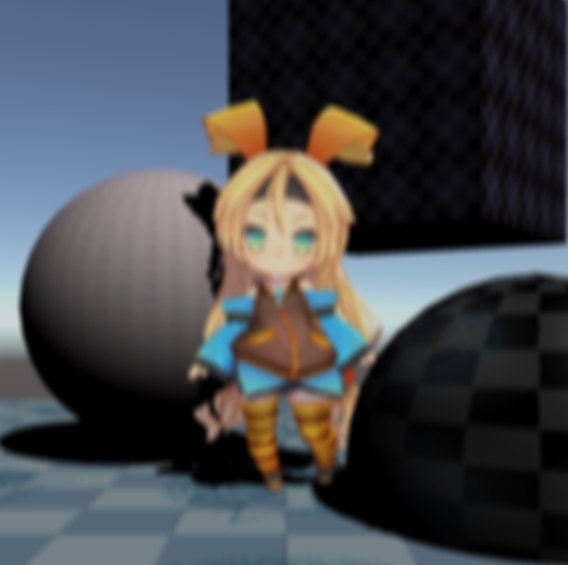
- フィルタ適用前

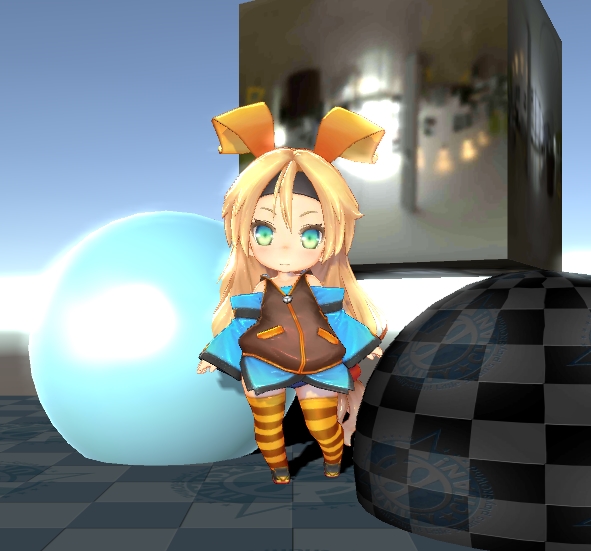
- フィルタ適用後
シェーダーコード
Shader "Custom/GaussianBlur" {
	Properties {
		_MainTex ("MainTex (RGB)", 2D) = "white" {}

		// ガウスフィルタ重み配列(8サンプリング分 _GaussParam0.xから順に 0〜8)
		_GaussParam0("GaussParam0", Vector) = (1, 0, 0, 0)
		_GaussParam1("GaussParam1", Vector) = (0, 0, 0, 0)

		_SamplingLevel("SamplingLevel", Int) = 8
	}

	SubShader
	{
		Tags { "Queue" = "Overlay" }

		ZWrite Off
		Blend Off
		Lighting Off

		// 1パス目:X軸方向にフィルタを掛ける
		Pass
		{
			CGPROGRAM

			#pragma vertex vert
			#pragma fragment frag

			#include "UnityCG.cginc"

			struct appdata_t{
				float4 vertex : POSITION;
				float2 texcoord : TEXCOORD0;
			};

			struct v2f{
				float4 vertex : SV_POSITION;
				half2 texcoord : TEXCOORD0;
			};

			sampler2D _MainTex;
			float4 _MainTex_ST;
			float _TexSize;
			float4 _GaussParam0;
			float4 _GaussParam1;
			int _SamplingLevel;

			// 1テクセルを正規化した値
			float4	_MainTex_TexelSize;

			v2f vert(appdata_t v)
			{
				v2f o;
				o.vertex = mul(UNITY_MATRIX_MVP, v.vertex);
				o.texcoord = TRANSFORM_TEX(v.texcoord, _MainTex);
				return o;
			}

			fixed4 frag(v2f input) : SV_Target
			{
				// テクセルサイズ
				half texel = _MainTex_TexelSize.x;

				// X方向のサンプリング
				half4 col = tex2D(_MainTex, input.texcoord) * _GaussParam0[0];

				for(int i = 1; i < 4 && i < _SamplingLevel; ++i)
				{
					col += tex2D(_MainTex, input.texcoord + half2( texel*i, 0)) * _GaussParam0[i];
					col += tex2D(_MainTex, input.texcoord + half2(-texel*i, 0)) * _GaussParam0[i];
				}
				for(int i = 4; i < 8 && i < _SamplingLevel; ++i)
				{
					col += tex2D(_MainTex, input.texcoord + half2( texel*i, 0)) * _GaussParam1[i-4];
					col += tex2D(_MainTex, input.texcoord + half2(-texel*i, 0)) * _GaussParam1[i-4];
				}
				col.a = 1;	// とりあえずαは1

				return fixed4(col);
			}

			ENDCG
		}

		// 1パス目の描画をテクスチャとする
		GrabPass{}

		// 2パス目:1パス目の画像を元にY方向にフィルタを掛ける
		Pass
		{
			CGPROGRAM

			#pragma vertex vert
			#pragma fragment frag

			#include "UnityCG.cginc"

			struct appdata_t{
				float4 vertex : POSITION;
				float2 texcoord : TEXCOORD0;
			};

			struct v2f{
				float4 vertex : SV_POSITION;
				half2 texcoord : TEXCOORD0;
			};

			sampler2D _GrabTexture;
			float4 _GrabTexture_ST;
			float _TexSize;
			float4 _GaussParam0;
			float4 _GaussParam1;
			int _SamplingLevel;

			float4	_GrabTexture_TexelSize;

			v2f vert(appdata_t v)
			{
				v2f o;
				o.vertex = mul(UNITY_MATRIX_MVP, v.vertex);
				o.texcoord = TRANSFORM_TEX(v.texcoord, _GrabTexture);
				return o;
			}

			fixed4 frag(v2f input) : SV_Target
			{
				// テクセルサイズ
				half texel = _GrabTexture_TexelSize.y;

				// テクセルサイズが負の値の時は、テクスチャの上下が反転しているらしい
				if(_GrabTexture_TexelSize.y < 0)
					input.texcoord.y = 1 - input.texcoord.y;

				// Y方向のサンプリング
				half4 col = tex2D(_GrabTexture, input.texcoord) * _GaussParam0[0];

				for(int i = 1; i < 4 && i < _SamplingLevel; ++i)
				{
					col += tex2D(_GrabTexture, input.texcoord + half2(0,  texel*i)) * _GaussParam0[i];
					col += tex2D(_GrabTexture, input.texcoord + half2(0, -texel*i)) * _GaussParam0[i];
				}
				for(int i = 4; i < 8 && i < _SamplingLevel; ++i)
				{
					col += tex2D(_GrabTexture, input.texcoord + half2(0,  texel*i)) * _GaussParam1[i-4];
					col += tex2D(_GrabTexture, input.texcoord + half2(0, -texel*i)) * _GaussParam1[i-4];
				}
				col.a = 1;	// とりあえずαは1

				return fixed4(col);
			}

			ENDCG
		}
	}

	FallBack "Diffuse"
}
メインカメラに追加するコンポーネント
- ガウスの重みパラメータを計算し、シェーダーへ渡す処理
- OnRenderImage()でフィルタを掛けて画面へ転送する処理
using UnityEngine;
using System.Collections;

public class GaussianBlur : MonoBehaviour
{
	// ガウスフィルタマテリアル
	public Material m_material;

	private const float DISPERSION = 5.0f;	// ガウス散乱率
	private const int SAMPLING_NUM = 8;		// サンプリング数

	// 重み格納配列(値をインスペクタで確認したいので、public)
	public float[] m_gaussWeight;

	void Start ()
	{
		// 重み計算
		{
			m_gaussWeight = new float[SAMPLING_NUM];
			float total = 0.0f;
			for (int i = 0; i < SAMPLING_NUM; ++i)
			{
				float weight = Mathf.Exp(-0.5f * (i * i) / (DISPERSION * DISPERSION));
				total += 2.0f * weight;
				m_gaussWeight[i] = weight;
			}
			for (int i = 0; i < SAMPLING_NUM; ++i) m_gaussWeight[i] /= total;
		}

		// 重み配列をシェーダへ渡す
		{
			if (m_material != null)
			{
				Vector4 v4 = new Vector4();
				v4.Set(m_gaussWeight[0], m_gaussWeight[1], m_gaussWeight[2], m_gaussWeight[3]);
				m_material.SetVector("_GaussParam0", v4);
				v4.Set(m_gaussWeight[4], m_gaussWeight[5], m_gaussWeight[6], m_gaussWeight[7]);
				m_material.SetVector("_GaussParam1", v4);
			}
		}
	}

	void OnRenderImage(RenderTexture src, RenderTexture dst)
	{
		// ガウスフィルタをかけて描画
		if(m_material != null)
		{
			Graphics.Blit(src, dst, m_material);
		}
	}
}
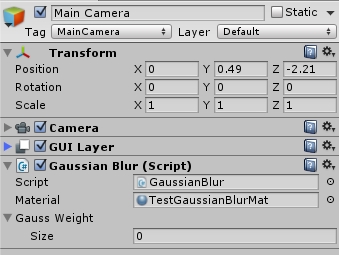
メインカメラ設定
シェーダーを設定したマテリアルを Material にセットします。
マテリアルのテクスチャは無しでOK。
参考サイト
ブルームを自作してみる
- 輝度抽出
- 抽出カラーを複数ずらして描画
- 上記テクスチャにブラーを掛ける
- 画面に重ね合わせ
という手順で実装しています。
処理は全部思いつきなので、コードは要所だけ載せます。
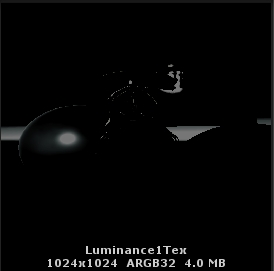
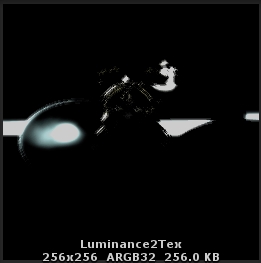
輝度抽出
Luminance()で輝度値を求めて、_SaturateLevelの値を超えた部分を抽出します。
その値に _LuminuncePow を掛けあわせてブルーム用のカラー値を増幅します。
この計算方法だと色が白に近い部分が抽出されやすく、そこに対して増幅するので、
抽出する色がどうしてもほぼ白くなってしまいます。
もっと良い感じの計算方法あるんですかね?
	// プロパティ
	Properties
	{
		_MainTex ("Base (RGB)", 2D) = "white" {}
		_SaturateLevel ("SaturateLevel", Range(0,1)) = 0.0
		_LuminancePow ("LuminacePow", float) = 0.0
	}

	// フラグメントシェーダ
	fixed4 frag (v2f i) : SV_Target
	{
		fixed4 c = tex2D(_MainTex, i.texcoord);
		fixed luminance = saturate(Luminance(c.rgb) - _SaturateLevel) * _LuminancePow;

		c.rgb *= saturate(luminance);
		return c;
	}
抽出カラーの重ねあわせ
OnRenderImage()でBlitMultiTap()を利用して、別のRenderTargetに描画します。
	Material		m_luminanceMat;	// 輝度抽出マテリアル
	RenderTarget	m_luminance1;	// 輝度テクスチャ
	RenderTarget	m_luminance2;	// 輝度テクスチャ重ねあわせ

void OnRenderImage(RenderTexture src, RenderTexture dst)
{
	m_luminance1.DiscardContents(true, true);
	Graphics.Blit(src, m_luminance1, m_luminanceMat);

	float offsetBase = 3;//オフセットピクセル数.
	// 適当に沢山重ねがけ
	Vector2[] offsets =
	{
		new Vector2( offsetBase*1   ,  offsetBase*1.0f),
		new Vector2( offsetBase*2   ,  offsetBase*0.5f),
		new Vector2( offsetBase*3   ,             0),
		new Vector2( offsetBase*1.0f,  offsetBase*1),
		new Vector2( offsetBase*0.5f,  offsetBase*2),
		new Vector2(            0   ,  offsetBase*3),

		new Vector2(-offsetBase*1   , -offsetBase*1.0f),
		new Vector2(-offsetBase*2   , -offsetBase*0.5f),
		new Vector2(-offsetBase*3   ,             0),
		new Vector2(-offsetBase*1.0f, -offsetBase*1),
		new Vector2(-offsetBase*0.5f, -offsetBase*2),
		new Vector2(            0   , -offsetBase*3),
	};
	m_luminance2.DiscardContents(true, true);
	Graphics.Blit(m_luminance1, m_luminance2);

	// 配列渡しだと、1枚目しか描画されなかったので、1枚ずつループさせる
	// シェーダー側で対応が必要なのかも…?
	for (int i = 0; i < offsets.Length; ++i)
		Graphics.BlitMultiTap(m_luminance1, m_luminance2, m_additive4Mat, new Vector2[] {offsets[i]});
}
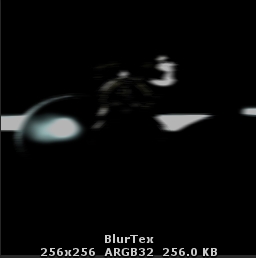
ブラーを掛ける
上記で作成したテクスチャに、ガウスブラーをかけます。
自作ブラーをそのまま使ってます。
ブルームテクスチャはこれで完成。
元の画像に重ねあわせ
OnRenderImage()内で、m_luminance2 作成後に以下の処理を続けます。
	// 元画像をそのまま出力
	Graphics.Blit(src, dst);

	// ブルームテクスチャを重ねる
	Graphics.Blit(m_blurTex, dst, m_additiveMat);