Google Maps Android API v2 
画面に地図(Googleマップ)を表示するには, MapFragmentクラスを利用する.
地図の表示
Android Studioでは, New Projectを作成する際に"MapsActivity"を選択すると簡単に地図を表示することができる.
以下のコードが自動生成される.
Google Maps Android API 「スタートガイド」参照.
以下のコードが自動生成される.
Google Maps Android API 「スタートガイド」参照.
- res/layout/activity_maps.xml
<fragment xmlns:android="http://schemas.android.com/apk/res/android"
xmlns:map="http://schemas.android.com/apk/res-auto"
xmlns:tools="http://schemas.android.com/tools"
android:id="@+id/map"
android:name="com.google.android.gms.maps.SupportMapFragment"
android:layout_width="match_parent"
android:layout_height="match_parent"
tools:context="com.moonlight_aska.android.web.mapsample01.MapsActivity" />
- java/xxx/MapsActivity.java
package com.moonlight_aska.android.web.mapsample01;
import android.support.v4.app.FragmentActivity;
import android.os.Bundle;
import com.google.android.gms.maps.CameraUpdateFactory;
import com.google.android.gms.maps.GoogleMap;
import com.google.android.gms.maps.OnMapReadyCallback;
import com.google.android.gms.maps.SupportMapFragment;
import com.google.android.gms.maps.model.LatLng;
import com.google.android.gms.maps.model.MarkerOptions;
public class MapsActivity extends FragmentActivity implements OnMapReadyCallback {
private GoogleMap mMap;
@Override
protected void onCreate(Bundle savedInstanceState) {
super.onCreate(savedInstanceState);
setContentView(R.layout.activity_maps);
// Obtain the SupportMapFragment and get notified when the map is ready to be used.
SupportMapFragment mapFragment = (SupportMapFragment)getSupportFragmentManager()
.findFragmentById(R.id.map);
mapFragment.getMapAsync(this);
}
/**
* Manipulates the map once available.
* This callback is triggered when the map is ready to be used.
* This is where we can add markers or lines, add listeners or move the camera. In this case,
* we just add a marker near Sydney, Australia.
* If Google Play services is not installed on the device, the user will be prompted to install
* it inside the SupportMapFragment. This method will only be triggered once the user has
* installed Google Play services and returned to the app.
*/
@Override
public void onMapReady(GoogleMap googleMap) {
mMap = googleMap;
mMap.setOnMapLoadedCallback(this);
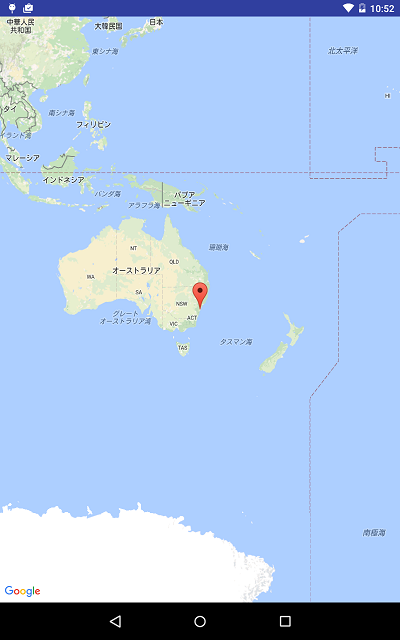
// Add a marker in Sydney and move the camera
LatLng sydney = new LatLng(-34, 151);
mMap.addMarker(new MarkerOptions().position(sydney).title("Marker in Sydney"));
mMap.moveCamera(CameraUpdateFactory.newLatLng(sydney));
}
}
- res/values/google_maps_api.xml
- YOUR_API_KEYに, コメント欄のリンクにアクセスし取得したAPI KEYを設定する.
<resources>
<!--
TODO: Before you run your application, you need a Google Maps API key.
To get one, follow this link, follow the directions and press "Create" at the end:
https://console.developers.google.com/flows/enable...
You can also add your credentials to an existing key, using this line:
D4:63:8A:31:D1:8C:02:A7:7D:74:4B:6B:03:E1:5F:4B:82:20:01:AA;com.moonlight_aska.android.web.mapsample01
Alternatively, follow the directions here:
https://developers.google.com/maps/documentation/a...
Once you have your key (it starts with "AIza"), replace the "google_maps_key"
string in this file.
-->
<string name="google_maps_key" templateMergeStrategy="preserve" translatable="false">YOUR_API_KEY</string>
</resources>
- manifests/AndroidManifest.xml
<?xml version="1.0" encoding="utf-8"?>
<manifest xmlns:android="http://schemas.android.com/apk/res/android"
package="com.moonlight_aska.android.web.mapsample01">
<!--
The ACCESS_COARSE/FINE_LOCATION permissions are not required to use
Google Maps Android API v2, but you must specify either coarse or fine
location permissions for the 'MyLocation' functionality.
-->
<uses-permission android:name="android.permission.ACCESS_FINE_LOCATION" />
<application
android:allowBackup="true"
android:icon="@mipmap/ic_launcher"
android:label="@string/app_name"
android:supportsRtl="true"
android:theme="@style/AppTheme">
<!--
The API key for Google Maps-based APIs is defined as a string resource.
(See the file "res/values/google_maps_api.xml").
Note that the API key is linked to the encryption key used to sign the APK.
You need a different API key for each encryption key, including the release key that is used to
sign the APK for publishing.
You can define the keys for the debug and release targets in src/debug/ and src/release/.
-->
<meta-data
android:name="com.google.android.geo.API_KEY"
android:value="@string/google_maps_key" />
<activity
android:name=".MapsActivity"
android:label="@string/title_activity_maps">
<intent-filter>
<action android:name="android.intent.action.MAIN" />
<category android:name="android.intent.category.LAUNCHER" />
</intent-filter>
</activity>
</application>
</manifest>
- 動作例
地図の表示(旧)
- res/layout/activity_main.xml
- 地図表示のためのフラグメントを配置する.
そのときは, Project > Cleanを実行する.
- Android 3.0 (API 12 HonyComb) 以上を対象とする場合は MapFragment, サポートパッケージを利用する場合は SupportMapFragment を指定する.
or
class="com.google.android.gms.maps.SupportMapFragment"
<RelativeLayout xmlns:android="http://schemas.android.com/apk/res/android"
xmlns:tools="http://schemas.android.com/tools"
xmlns:map="http://schemas.android.com/apk/res-auto"
android:layout_width="match_parent"
android:layout_height="match_parent"
tools:context=".MainActivity" >
<fragment
android:id="@+id/map"
android:layout_width="match_parent"
android:layout_height="match_parent"
class="com.google.android.gms.maps.SupportMapFragment"
map:cameraTargetLat="35.41"
map:cameraTargetLng="139.41"
/>
</RelativeLayout>
- MainActivity.java
- android.support.v4.app.FragmentActivityをインポートする.
- FragmentActivityを継承したActivityクラスを作成する.
package com.moonlight_aska.android.googlemapv2;
import android.os.Bundle;
import android.support.v4.app.FragmentActivity;
public class MainActivity extends FragmentActivity {
@Override
protected void onCreate(Bundle savedInstanceState) {
super.onCreate(savedInstanceState);
setContentView(R.layout.activity_main);
}
}
- AndroidManifest.xml
- android.permission.INTERNETのパーミッションを設定する.
- android.permission.ACCESS_NETWORK_STATEのパーミッションを設定する.
- android.permission.WRITE_EXTERNAL_STORAGEのパーミッションを設定する.
- com.google.android.providers.gsf.permission.READ_GSERVICESのパーミッションを設定する.
- 地図の描画にOpenGL ES2を使用しているので, OpenGL ES2が必要な旨を指定する.
- APIキーを設定する.
- GooglePlayService4.0以降では, バージョンを指定する.
<?xml version="1.0" encoding="utf-8"?>
<manifest xmlns:android="http://schemas.android.com/apk/res/android"
package="com.moonlight_aska.android.googlemapv2"
android:versionCode="1"
android:versionName="1.0" >
<uses-sdk
android:minSdkVersion="8"
android:targetSdkVersion="17" />
<uses-permission android:name="android.permission.INTERNET" />
<uses-permission android:name="android.permission.ACCESS_NETWORK_STATE" />
<uses-permission android:name="android.permission.WRITE_EXTERNAL_STORAGE" />
<uses-permission android:name="com.google.android.providers.gsf.permission.READ_GSERVICES" />
<!-- The following two permissions are not required to use
Google Maps Android API v2, but are recommended. -->
<uses-permission android:name="android.permission.ACCESS_COARSE_LOCATION"/>
<uses-permission android:name="android.permission.ACCESS_FINE_LOCATION"/>
<uses-feature
android:glEsVersion="0x00020000"
android:required="true" />
<application
android:allowBackup="true"
android:icon="@drawable/ic_launcher"
android:label="@string/app_name"
android:theme="@style/AppTheme" >
<meta-data
android:name="com.google.android.maps.v2.API_KEY"
android:value="*******************" /> ← APIキー
<meta-data
android:name="com.google.android.gms.version"
android:value="@integer/google_play_services_version" />
<activity
android:name="com.moonlight_aska.android.googlemapv2.MainActivity"
android:label="@string/app_name" >
<intent-filter>
<action android:name="android.intent.action.MAIN" />
<category android:name="android.intent.category.LAUNCHER" />
</intent-filter>
</activity>
</application>
</manifest>
注) Googleマップを利用するには, Google Play Servicesをダウンロードし, プロジェクトに"google-play-services_lib"にインポートしておく必要がある.
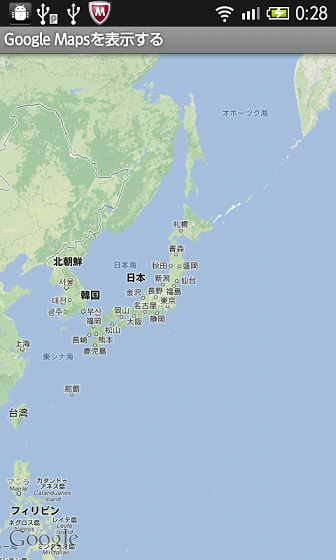
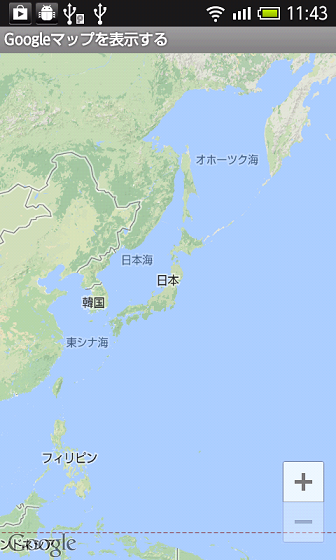
- 動作例
Google Maps Android v1 API
画面に地図(Googleマップ)を表示するには, MapViewクラスを利用する.
地図の表示
- MainActivity.java
- MapViewクラスを利用するために, MapActivityクラスを継承する.
package com.moonlight_aska.android.web.googlemap01;
import android.os.Bundle;
import com.google.android.maps.MapActivity;
// MapActivityを継承
public class MainActivity extends MapActivity {
@Override
protected void onCreate(Bundle savedInstanceState) {
super.onCreate(savedInstanceState);
setContentView(R.layout.activity_main);
}
@Override
protected boolean isRouteDisplayed() {
// TODO Auto-generated method stub
return false;
}
}
- res/layout/activity_main.xml
- MapViewを配置する.
- ドラッグを有効にする.
- Maps APIキーを設定する.
<RelativeLayout xmlns:android="http://schemas.android.com/apk/res/android"
xmlns:tools="http://schemas.android.com/tools"
android:layout_width="match_parent"
android:layout_height="match_parent"
tools:context=".MainActivity" >
<com.google.android.maps.MapView // MapViewを配置
android:id="@+id/mapview"
android:layout_width="fill_parent"
android:layout_height="fill_parent"
android:enabled="true"
android:clickable="true"
android:apiKey="****************************************" // Maps APIキー
/>
</RelativeLayout>
- AndroidManifest.xml
- android.permission.INTERNETのパーミッションを追加する.
- Mapsのライブラリを追加する.
<?xml version="1.0" encoding="utf-8"?>
<manifest xmlns:android="http://schemas.android.com/apk/res/android"
package="com.moonlight_aska.android.web.googlemap01"
android:versionCode="1"
android:versionName="1.0" >
<uses-sdk
android:minSdkVersion="8"
android:targetSdkVersion="17" />
<uses-permission android:name="android.permission.INTERNET"/>
<application
android:allowBackup="true"
android:icon="@drawable/ic_launcher"
android:label="@string/app_name"
android:theme="@style/AppTheme" >
<activity
android:name="com.moonlight_aska.android.web.googlemap01.MainActivity"
android:label="@string/app_name" >
<intent-filter>
<action android:name="android.intent.action.MAIN" />
<category android:name="android.intent.category.LAUNCHER" />
</intent-filter>
</activity>
<uses-library android:name="com.google.android.maps" />
</application>
</manifest>
- 動作例