音声で文字入力する
最終更新:
 moonlight_aska 2011年06月18日(土) 10:19:16履歴
音声認識機能を使って文字入力を行うには, RecognizerIntentクラスを使う.
注) Androidの音声認識機能は, 端末とサーバとで処理を分担する分散型音声認識(DSR:Distributed Speech Recognition)と呼ばれる方式のようで, 音声認識機能を使用する際にはサーバに接続するために3GまたはWiFiが有効である必要がある.
音声認識機能を使ってみる
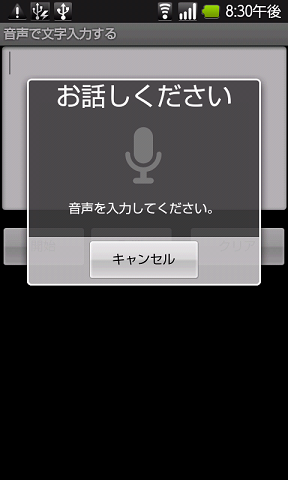
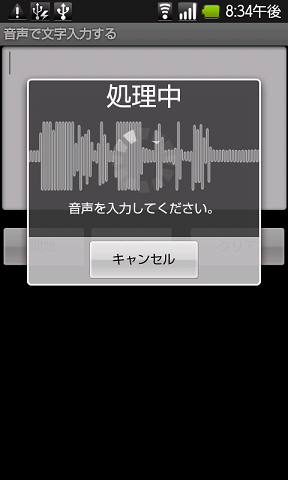
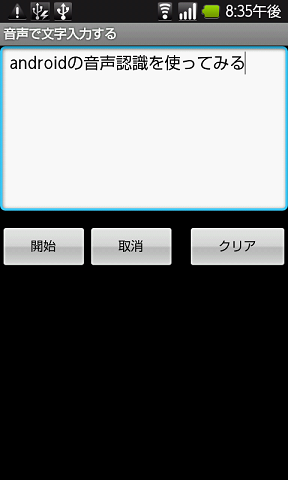
[動作例]
音声認識は, エミュレータでは動作しないので, SH-03Cで試してみた.
入力 : 「Androidの音声認識を使ってみる」
↓
↓
注) Androidの音声認識機能は, 端末とサーバとで処理を分担する分散型音声認識(DSR:Distributed Speech Recognition)と呼ばれる方式のようで, 音声認識機能を使用する際にはサーバに接続するために3GまたはWiFiが有効である必要がある.
音声認識機能を使ってみる 
- SpeechRecognizer.java
- RecognizerIntent.ACTION_RECOGNIZE_SPEECHを指定して, インテントのインスタンスを生成する.
- Intent#putExtraメソッドで, RecognizerIntent.EXTRA_LANGUAGE_MODELにRecognizerIntent.LANGUAGE_MODEL_FREE_FORMをセットする.
- Intent#putExtraメソッドで, RecognizerIntent.EXTRA_MAX_RESULTSに候補数をセットする. (現状は設定できないのでコメントアウト)
- Intent#putExtraメソッドで, RecognizerIntent.EXTRA_PROMPTに音声入力時のメッセージをセットする.
- startActivityForResultメソッドで, インテントを発行して音声認識を起動する.
- 認識が終了すると, onActivityResultがコールされるので, requestCode及びresultCodeをチェックする.
- Intent#getStringArrayListExtraメソッドで, 認識結果の配列を取得する.
- 認識結果を入力文字列に追加する.
package com.moonlight_aska.android.speechrecognizer;
import java.util.ArrayList;
import android.app.Activity;
import android.content.ActivityNotFoundException;
import android.content.Intent;
import android.os.Bundle;
import android.speech.RecognizerIntent;
import android.util.Log;
import android.view.View;
import android.widget.Button;
import android.widget.EditText;
import android.widget.Toast;
public class SpeechRecognizer extends Activity implements View.OnClickListener {
private static final int REQUEST_CODE = 1;
private EditText inpText;
private String preInp = "";
private Button inpBtn, canBtn, clsBtn;
/** Called when the activity is first created. */
@Override
public void onCreate(Bundle savedInstanceState) {
super.onCreate(savedInstanceState);
setContentView(R.layout.main);
inpText = (EditText)findViewById(R.id.result_id);
inpBtn = (Button)findViewById(R.id.speech_id);
inpBtn.setOnClickListener(this);
canBtn = (Button)findViewById(R.id.cancel_id);
canBtn.setOnClickListener(this);
clsBtn = (Button)findViewById(R.id.clear_id);
clsBtn.setOnClickListener(this);
}
@Override
public void onClick(View v) {
// TODO Auto-generated method stub
if(v == inpBtn) {
try {
// 音声認識の準備
Intent intent = new Intent(RecognizerIntent.ACTION_RECOGNIZE_SPEECH);
intent.putExtra(RecognizerIntent.EXTRA_LANGUAGE_MODEL,
RecognizerIntent.LANGUAGE_MODEL_FREE_FORM);
// Intent.putExtra(RecognizerIntent.EXTRA_MAX_RESULTS, 5);
intent.putExtra(RecognizerIntent.EXTRA_PROMPT, "音声を入力してください。");
// インテント発行
startActivityForResult(intent, REQUEST_CODE);
}
catch (ActivityNotFoundException e) {
Toast.makeText(SpeechRecognizer.this, "Not found Activity", Toast.LENGTH_LONG).show();
}
}
else if(v == canBtn) { // 認識結果の取り消し
if(preInp != null) {
inpText.setText(preInp); // 前の入力文字列を表示
inpText.setSelection(preInp.length()); // カーソルを移動
}
}
else if(v == clsBtn) { // テキストのクリア
inpText.setText("");
}
}
@Override
protected void onActivityResult(int requestCode, int resultCode, Intent data) {
String input = "";
// TODO Auto-generated method stub
super.onActivityResult(requestCode, resultCode, data);
if(requestCode == REQUEST_CODE && resultCode == RESULT_OK) {
preInp = inpText.getText().toString();
// 認識結果を取得
ArrayList<String> candidates = data.getStringArrayListExtra(RecognizerIntent.EXTRA_RESULTS);
Log.v("Speech", "Candidate Num = " + candidates.size());
if(candidates.size() > 0) {
input = preInp + candidates.get(0); // 認識結果(1位候補)
}
if(input != null) {
inpText.setText(input); // 入力文字列を表示
inpText.setSelection(input.length()); // カーソルを移動
}
}
}
}
- res/layout/main.xml
<?xml version="1.0" encoding="utf-8"?>
<LinearLayout xmlns:android="http://schemas.android.com/apk/res/android"
android:orientation="vertical"
android:layout_width="fill_parent"
android:layout_height="fill_parent"
>
<EditText android:id="@+id/result_id"
android:layout_width="fill_parent"
android:layout_height="wrap_content"
android:gravity="top|left"
android:lines="8"
/>
<LinearLayout
android:orientation="horizontal"
android:layout_width="fill_parent"
android:layout_height="wrap_content"
android:layout_marginTop="20px"
>
<Button android:id="@+id/speech_id"
android:layout_width="wrap_content"
android:layout_height="wrap_content"
android:text="@string/input_button_label"
android:layout_weight="1"
/>
<Button android:id="@+id/cancel_id"
android:layout_width="wrap_content"
android:layout_height="wrap_content"
android:text="@string/cancel_button_label"
android:layout_weight="1"
/>
<Button android:id="@+id/clear_id"
android:layout_width="wrap_content"
android:layout_height="wrap_content"
android:text="@string/clear_button_label"
android:layout_marginLeft="20px"
android:layout_weight="1"
/>
</LinearLayout>
</LinearLayout>
[動作例]
音声認識は, エミュレータでは動作しないので, SH-03Cで試してみた.
入力 : 「Androidの音声認識を使ってみる」
↓
↓

このページへのコメント
返信ありがとうございます参考にします。
「音声で文字入力する」で記載しているコードの中で, 基本的には赤字の部分は必要です.
こんにちは貴方の音声で文字入力のアプリを参考にしてオリジナルのアプリ作ろうと考えてるの者ですが 音声を入力してくださいという 機能を使いたいのですがどのプログラムコードかを教えてくださると助かります。